 Many computer experts believe that SSDs will soon turn from an alternative to the good old HDD into a full replacement for them. Many users already now independently and without much difficulty can change the hard drive of a computer or expand their laptop memory using SSD. How to put an SSD in a laptop will be discussed in this article.
What you need to install SSD
To begin with, it is worth noting that the enthusiasm for drives of this type is understandable, since the use of SSD allows the user to get the following advantages:
- Reduce OS boot time up to 5 times.
- Increase the device’s runtime without recharging.
- Get rid of the crunching and grinding that are present in many HDDs.
- Significantly increase the overall speed of the device, if we are talking about replacing the old, "braking" HDD.
In addition, such a drive is more resistant to mechanical damage.
Many users, in connection with a number of such significant advantages of SSDs of a more modern type, have a reasonable question about why SSDs are not installed by manufacturers everywhere in all new computers and laptops. The answer to this question is quite simple: it’s the price tag. Still much more expensive than their HDD counterparts, SSDs add a few thousand rubles to the total cost of equipment, which, given modern prices, will scare away many potential buyers.
To install a new SSD in a laptop, you will need:
- The drive itself and the laptop.
- Screwdriver (cross-shaped or straight, depending on the type of cover bolt).
- Bank or other plastic card (it is convenient to pry the lid with it).
- A flash card for saving and transferring information to a new disk.
Important!It is recommended to carry out mounting and dismounting of hard drives, having at least minimal skills and experience in handling equipment. An inexperienced user can harm the "stuffing" of the laptop.
Options for installing an SSD hard drive in a laptop
Experts note that there are several ways to install SSD in a laptop. Firstly, you can simply replace the HDD with an SSD (for example, if the old one has failed). Secondly, you can insert an SSD instead of a drive using a special adapter, which can be purchased at a computer parts store. Thirdly, with the help of such an adapter, you can install an HDD in place of the drive, and install a new SSD in its place. Another option is to connect a replaced but working HDD using a special box, but this option is not too good for those devices that are often transferred from place to place.
In general, saving the old disk as a backup data storage allows you to somewhat expand the technical potential of the laptop. When replacing the drive, the user, in fact, only expands the amount of memory available to the device. In addition, installing an additional drive in a CD-rom absolutely does not affect the appearance of the laptop. However, with all this, the most common option for installing an SSD in a laptop is the first way, when one drive is simply replaced by another.
Installing an SSD instead of an old HDD
Before starting the replacement, you need to disconnect the laptop from the power and free it from all connections - flash drives, mice, webcams, headphones, etc. After that, you can proceed to the "analysis" of the following items:
- First of all, you should turn the laptop over, inspect its bottom wall. It is necessary to find on it where the panel that protects the hard drive, as well as the battery is located. Next, you need to remove the battery by pressing on the special latches (most often they are located on each side of it).
- When the battery is removed, unscrew the fasteners of the hard cover with a suitable screwdriver. Do not be too zealous with a screwdriver: if the screw does not get out, it is better to try another tool than to use force and tear off the edges on it.
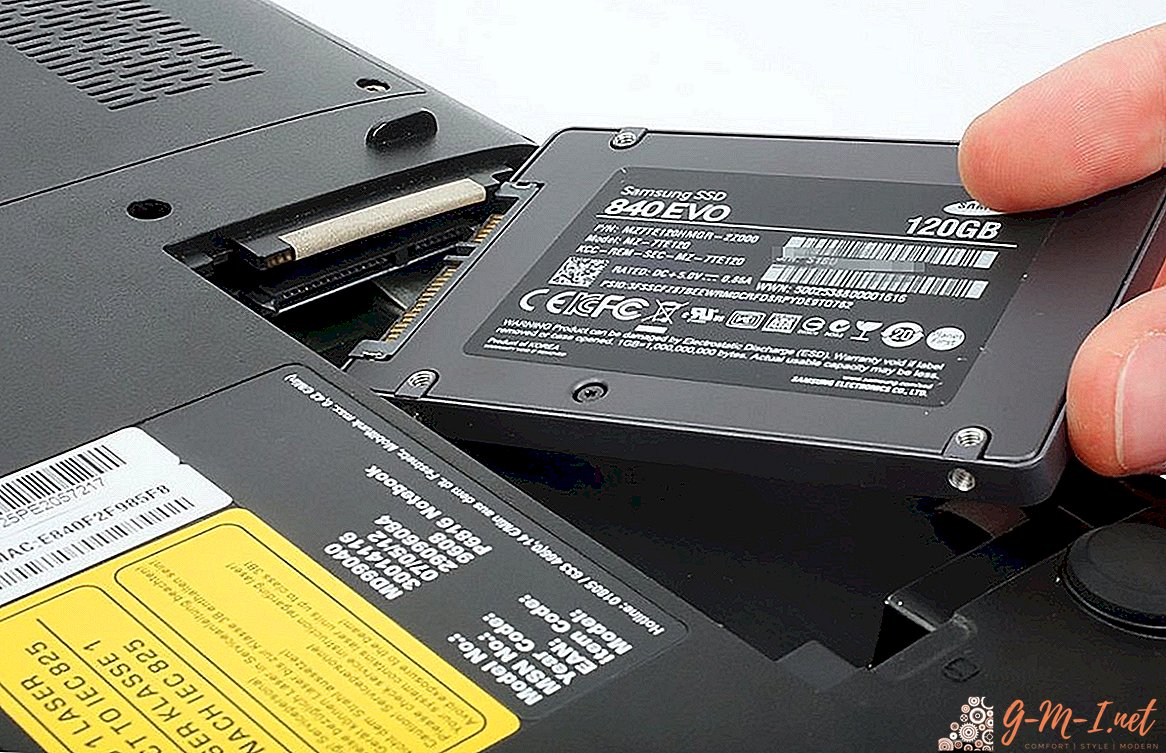
- The hard drive itself is usually also fixed in the connector with screws, and having unscrewed them, it can be easily removed.
- In place of the dismantled disk, you can put a new one, without forgetting about the mounts.
- After fixing the cover on the screws and installing the battery in its original place, you can proceed to the stage of checking the definition of the disk system.

To perform this check, the user must enter the BIOS. The model of the current disk is shown in most laptops in the BIOS on the main screen. If the installed disk does not appear, the reason may be:
- poor contact in the SATA connector;
- malfunctions of the drive itself;
- old BIOS system.
In the first case, you can try reconnecting the drive, having performed all the described parsing operations again. In order to make sure that it is not a malfunction of the SSD, you need to check its performance on another laptop or personal computer.
Important!In the case of the old BIOS version, problems with the SSD can be fixed by updating it to a newer version. This can be done with certain skills in using computer equipment, or by contacting specialists in the service.
If the system successfully and constantly "sees" the installed drive, then you need to check its operation mode. To do this, all in the same BIOS, go to the “Advanced” tab, and pay attention to the “SATA Operation” line. If the inscription “AHCI” is opposite it, then everything is in order, if not, the operating mode must be changed to AHCI.
When all the above operations have been successfully completed, you can proceed directly to the installation of the OS and optimize its work for the new drive. When installing a new OS, it automatically optimizes services for the most comfortable work with the new drive.
Leave Your Comment